|
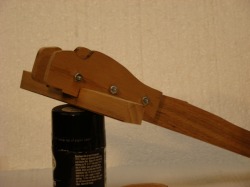
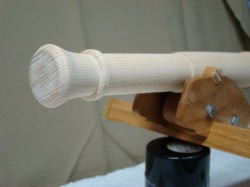
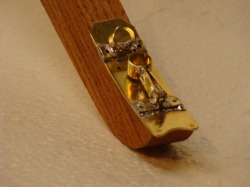
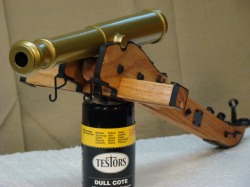
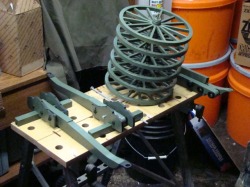
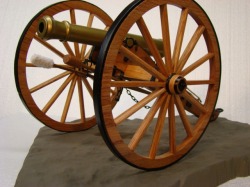
Tonight we are going to head to the Civil War and talk about the cannons of Fubar IV. If you have been around here for a while, you have already seen the Update on his fabulous ACW Battle Forge. Tonight we are going to look at some of his great cannons. When you see a scene like this, it is almost hard to believe that it is 1:6th just due to the scope of what you are seeing. These cannon are simply amazing.  It starts with pieces of wood, which are carefully crafted to the correct size and shape from precise drawings. Fubar has always been very skilled at woodworking. It is only logical that when he applied those skills towards building scale cannon that the result would be museum quality masterpieces.  The carriage is made up of four pieces of wood and this is what it looks like before any of the detail goes into it. Even at this point it is easy to see the accuracy of the parts.  Fubar turned each of his cannon barrels on the lathe. Over time he has made several different kinds of barrels, all of which are styled after Civil War cannons. This one pictured is one of my particular favorites.  A variety of materials were used to create the details on Fubar's cannons. Brass and styrene are the two most used materials. This working support made from brass is really sharp looking work.  Fubar's first cannon was left in it's natural wood, rather than being painted to show off the beauty of the wood. Here you see it before the wheels were added. All of the added details have been painted black and the cannon barrel itself brass.  Of course what scares most folks about a project like this are the wheels. After making his first cannon with wood rims, Fubar hit on the idea of making his wheel rims by cutting PCV pipe of the proper diameter into thin slices to make nice solid sturdy wheels. He then adds the hub and spokes from wood.  The result is a beautiful looking field piece that can also stand up to backyard use. This is that original cannon as it was finally completed. It's okay to drool. As a matter of fact, here are a couple more pictures to drool over. I really love this natural wood finished field piece, it reminds me of the models I saw in the Smithsonian as a kid, but for shots in the field, he has a complete battery done in green. Add to that his limbers and Battle Forge and you have an amazing slice of Civil War artillery. Well, that's all for tonight Campers, hope you enjoyed this "Blast from the Past". Until next time, have a good one!
3 Comments
Tonight, we are going to look at OKIMBORED's technique for finishing MARX horses. You already know that the Marx horse is my favorite 1:6th mount and here you see a beautiful example of why. This is a great looking horse. 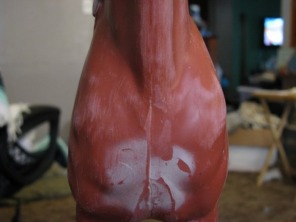 OK started the project by sanding all the seams flush and there are plenty of them to sand on a Marx horse, it's not just the body, it's all the legs too. 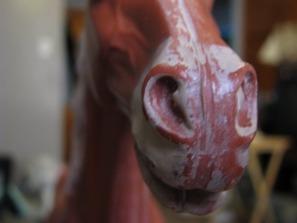 Next, OK used a Dremel tool to deepen the nostrils for a more realistic look. 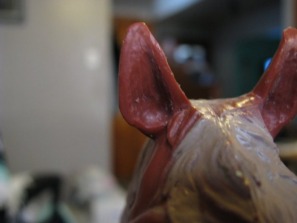 The same technique was used to deepen the ears. It doesn't seem like much of a change, but it makes a huge difference. 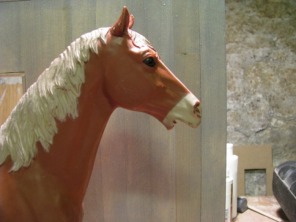 One of the complaints about the Marx horse is the open mouth doesn't look realistic. I've never tried this, but OK, adventurous soul that he is removed the lower jaw. 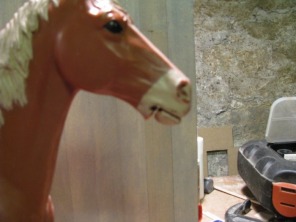 And then repositioned it so that the mouth would appear to be closed, or at least as closed as a horse's mouth gets when it has a bit in it. Looks pretty good, a lot more natural. 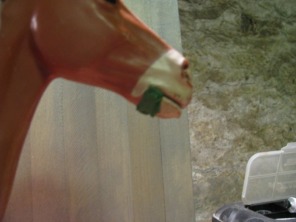 The next step was to putty the mouth with Green Stuff. Looks a little bulky here, but it hasn't been sanded yet. 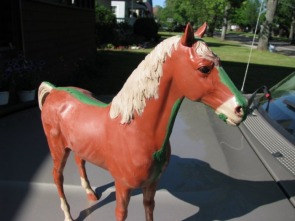 The rest of the horse was puttied as well, you know in all the "seamly" places 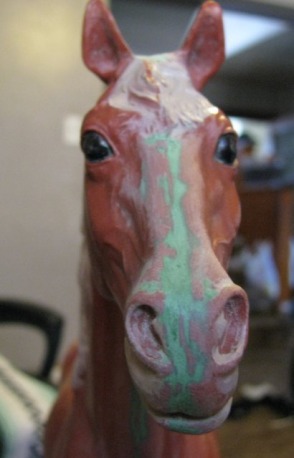 Once the putty had a chance to set, OK was able to begin sanding. This is always my favorite part (I hate sanding), you as you can begin to see, it will be well worth the effort in the final finish of the model. 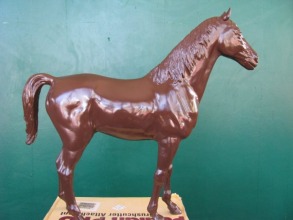 After the sanding, then it was time for painting. OK did more than one layer of paint. He started out with a brown and then moved to a darker coat. Finally he hit the whole thing with a coat of matte to bring down the sheen. 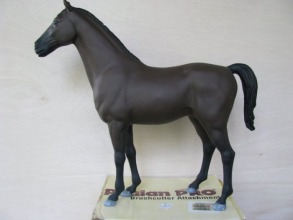 And this is the final result, a great looking mount for one of OK's Cavalry Troopers. Great looking horse buddy, really sharp looking finish. That's all for tonight. Hope you got some helpful hints on finishing horses. Until next time, have a good one.
GERMAN WWII PDF PRINTABLES ARE NOW AVAILABLE 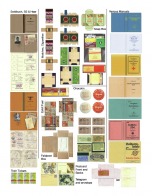 Hey Campers, as promised, WWII German Printables are now available for making Soldbuchs, Cigarettes, Postcards, Rations and more. There are four new PDF pages on Point Man's Privy which can be downloaded and printed in Hi-Res. It is not everything I would like to eventually make, but it is a pretty fair start and will give you some pieces that you can't get anywhere else without putting out some hard-earned cash. There is also a link on the printables page to take you to some notes that I made about the items and their construction. Mind you it is not every last detail, but if you have questions, you can always give me a holler. Or ask a question here in the blog. Hopefully, you will find something that you can use to outfit your Germans. A fun project, but since I have spent most of the weekend working on it, the blog is going to be a bit short this time. Until next time, have a good one!
Well, last night we had our monthly meeting (see our contact page for more information about meeting times). We had a smaller group than normal, but it was a real good meeting even with fewer numbers. I've got a few pictures of the highlights here. We're going to start with some figures by the EVIL DR. ZORKON. 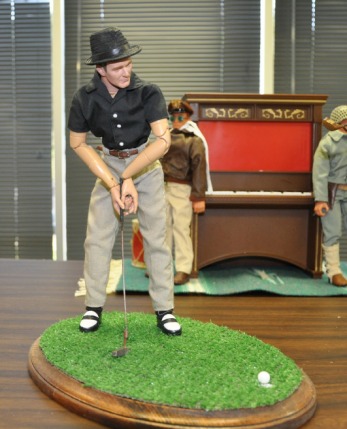 I've got an UPDATE coming up specifically on DR. ZORKON. This guy is amazing, not only his ability to put together unique figures, but also the imagination to dream them up in the first place. We start out with a pair of Golfers. I don't know anything about golf, but it looks like more modern figure and then a golfer from the '40's. 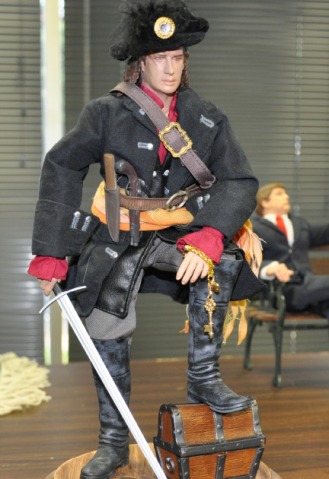 Next, we've got this really great looking pirate. The Good Doctor put this one together for like $5 or some incredibly low amount like that. He is a master at finding great deals on items and seeing how they are going to all go together to make a unique figure. When I saw this figure, the books of Robert Lewis Stevenson came to mind, Treasure Island and Kidnapped. 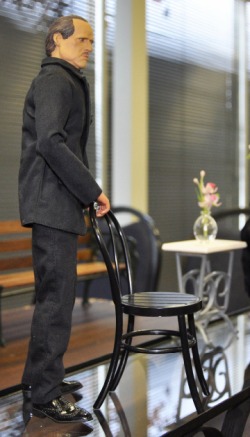 I am not really to familiar with this figure, but I understand it is the godfather. I really like that little table and the chairs. The Doctor is always finding little pieces like this to create neat little vignettes. 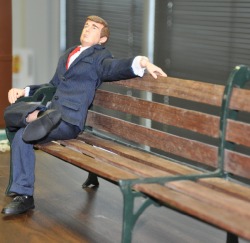 And how about this bench. This thing is like two feet long. It would be perfect for creating the setting of a train station platform (in just about any era). The Doctor paid next to nothing for this great find as well. I tried to keep from drooling on it. And yes, that is Donald Trump taking a much needed rest on the bench. 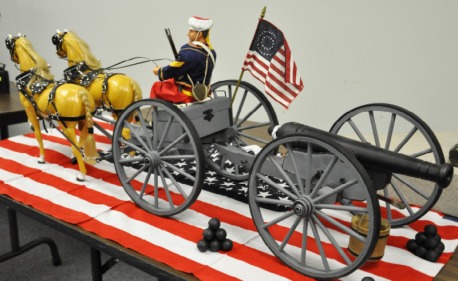 Next we have beautiful cannon and limber from General Paul. This is a real beauty. I like how he had it displayed with a team on an American flag. It really looked sharp. 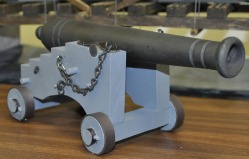 He also made this great looking Naval Cannon. It would look pretty good with Dr. Zorkon's Pirate I think. I am waiting to see the ship Paul. 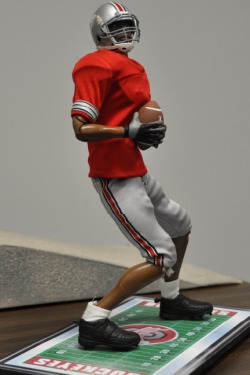 Paul's wife, Nancy had this Buckeye Football Player on Display. I like the neat little stand that he is displayed on. Pretty sharp. I am not really a Buckeye's fan (don't tell anyone), but I thought this was a real cool figure. Paul's son, Trooper Tim, put together this little vignette of a couple of "law enforcement types". I am not sure if these figures are from show or something, but I really like his setting with the floor and wall. It creates a nice scene. 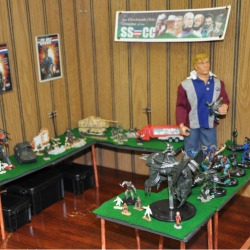 Here Tim has created another interesting little vignette with what looks like some swap meet tables or a toy show. I am not sure exactly what the theme was, but it was a nice job of finding some "toy" sized items that could be used as well... toys. The LT, Sergeants Washington and Watkins, and Doc Thompson from VIETNAM STORY put in an appearance as well. The lugged in a few of the sandbags that Mrs. Pointman is making for Firebase Cooper (she's got a long way to go). It was my evening to do some demos. I did a little demo on working with the "printables" featured on this site and a second little demo on 1:1 paper items -weathering and distressing. The picture below shows some of the items that I have done for my Vietnam impression. In the corner there you can also see the 1:1 scale version of Doc's Diary and Photo Album. It was a great club meeting and those of us that were there missed all of the club members that couldn't make it for one reason or another. If you are ever in the Cincinnati area on the second Wednesday of the month, be sure to stop in, we would all like to get to know you. That's all for tonight, until next time, have a good one!
Tonight was meeting night and that means a long drive home for me and no time to do the update. The UPDATE will be back tomorrow night with some pictures from the meeting. So, until then... have a good one!
I wanted to feature my good friend CK2 this evening and give you a personal invitation to check out his website; CHECKMATEKING2's KINGDOM I've known CK2 for a lot of years and yes, I still like him (ha-ha). Truthfully, he's one of those folk that would give you the shirt of his back. So, tonight in honor of his new website, I would like to share some of my favorite CK2 photos, but these all fall within a specific theme. Tonight, we are doing the Union Army. These two shots above really demonstrate his ability to get in and get the shot that tells an interesting story. Even without bullets flying, it still has a feeling of tension about it. 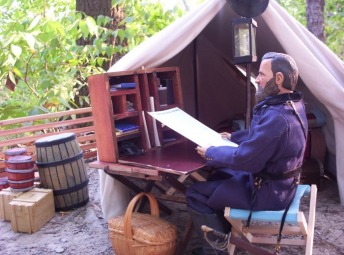 These next four pics are from CK2's Vicksburg shoot. I love that Side Show Grant in front of CK2's scratchbuilt tent. What a great looking diorama. 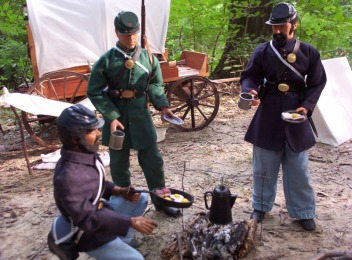 Here the boys are cooking up a little breakfast before moving out. That beautiful CK2 scratchbuilt wagon makes the perfect backdrop for this little scene. Here we are, ..."once more unto the breach"... Union boys have got the stone wall this time and something tells me that there aren't any southern boys that will be taking this line. (by the way, for all you that have at one time or another questioned my breeding, that quote is Shakespeare, King Henry the fifth) So congratulations old buddy on a great looking website. It came out real nice. You all hit on the link above and go take a look. You won't be disappointed. Until next time, have a good one.
 Well, we move tonight from WWII desert Jeep to Vietnam and my armored Mutt - The RAT PATROL. It is funny (funny strange, not funny ha-ha) that I should pick a name from a TV series about WWII troops fighting in the desert in Jeeps. But maybe not so strange when you think about it. The Rat Patrol TV show aired during the 1960's and wasn't unknown to GIs in Vietnam (perhaps not as popular as COMBAT, but known none the less). 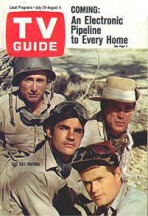 The Rat Patrol-ran for two seasons, a total of 56 color episodes, on ABC from September 12, 1966 to September 16, 1968. The show starred Christopher George as Troy, and Eric Braden as Dietrich; writers included Larry Cohen and Lorenzo Semple Jr. THE RAT PATROL followed the adventures of an elite team of commandos of 111th Armor Recon, attached to the Long Range Desert Group, as they wreaked havoc with Rommel’s Afrika Korps during WW II. Led by the charismatic Sergeant Sam Troy, our heroes often found themselves pitted against their German nemesis DAK Hauptmann Dietrich. And yes, there is evidence that it was popular with folks in Vietnam. But wait...there's more. Check out this helmet cover, it is hard to see, but you will see the words RAT PATROL on the cover as well as a very crude drawing of a little Jeep with some kind of gun mounted on it. Anyway, that's my inspiration for the RAT PATROL armored Mutt. I don't know where I came up with the Mickey Mouse Idea, I guess I decided on the name RAT PATROL and then began thinking about a VC Rat and then the Mickey Mouse thing happened. Well, that's how "art" is sometimes. 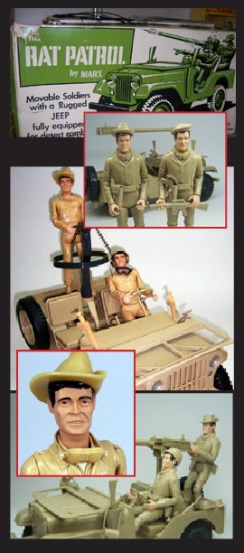 Just an interesting little side note, as I was researching the Rat Patrol TV show, I found a reference to a MARX Rat Patrol Jeep with figures. I sure never saw this thing before. I had no idea that Marx did anything like this at all. It was definitely based on the television show, though I am curious as to whether or not it was a licensed product. Interesting that one of the figures is holding an M-16. Mistake, or done intentionally? Does anyone know? And was MARX copying the Hasbro Desert Jeep, or was it the other way around? Here's the Hasbro piece by the way (below). By today's standard, it isn't much, but to tell you the truth, when this thing first came out, I wanted one as badly as everyone else. Hey Troopers, last time on the UPDATE, we did part one of this SAS Jeep tutorial (a repeat for the guys in the SSCC, but I told you there was going to be an occasional repeat). Today we finish it off and then move onto another kind of "Rat Patrol" tomorrow. Well, there it is folks. Like I said, a bit boring for the folks that have already seen it, but timely with the release of the Dragon SAS Jeep. If I have shown one trooper that there is an alternative to spending $300, well... then I have accomplished my goal. Just food for thought. Tomorrow night we are going to look at some of the thought process on my armored Vietnam gun Jeep - RAT PATROL. I have dug up some interesting pictures and information, so until next time... have a good one!
Okay, this UPDATE is going to be a repeat for everyone in the club, but I do think it is timely. There was a post on the Sixth Division about the Dragon SAS Jeep just the other day and I want to hold out hope for folks that do not have $300 to spend on a Jeep. It has been a number of years since I built my SAS Jeep and I sure don't have $300 in it, but hopefully there will be someone out there that can use this information. SSCC Members, bear with me for a couple of UPDATES, this is one of those repeats I warned you about. I'll try to take some of the pain out of it by removing the original introduction. When this was originally posted on GL's site, this is where part one ended. I've eliminated a couple of transition frames so that we can just keep going. Okay, this is where we are going to end for tonight. Sunday evening I will finish this up and then we will move on to a new, but related subject, which I hope everyone will enjoy, Until then, have a good one!
This is perhaps a little off-topic, but since I have uploaded some of the art that I had planned to put on the site, I thought that I would continue along the same vein with the UPDATE and talk about some 1:1 art that I did back when I was reenacting. The picture below is an overview of tonight's discussion. 1. Personal photo album, designed to be carried in the tunic pocket. 2. SS Pocket knife, reproduction, with swastika and Adolph Hitler’s signature inscribed on blade. 3. Reproduction army manual on German mine detector. 4. German identity disk (dog tag). This is a reproduction that has been hand stamped and aged. 5. Storybook in German, an original dated back to 1920, printed in gothic font, text is a Christmas story. 6. German march song book, original 1940 7. Reproduction SS Branch Soldbuch, aged. 8. 1935 Original party pin. 9. Original junior officer’s identification pennant. 10. Computer generated Deutch Marks of various denominations. 11. Handmade period postcard, with computer generated stamp. 12. Computer generated railway ticket stubs, distressed by hand. 13. Black and white picture of my lovely bride with period like scallop edges and hand distressing (the photo, not the bride) The postcard is one of my favorite pieces. The original card was made by a friend. I added the stanp and my wife did the writing. The contents of the writing, which are in German are from a young bride to her German Soldier at the front. The postal stamp was done by hand with circle templates and a steady hand. The computer generated stamp was cut out and glued in place to give the relief of an actual stamp on the card. The unit stamp is one that I own. The Deutch Marks are two sided, made on the computer. Once printed, they were distressed by hand to achieve the look of having been carried around. Of course a majority of the project was the Soldbuch itself. I wanted it to look as though it had been carried around in a jacket pocket, unprotected, for a couple of years. The entries in the book indicate a soldier that has been in combat for about a year after his initial training, the book would have received some wear and tear by this point. The soldbuch is an item that can be purchased and that is what I did, but I took mine apart and carefully scanned all the pages in the pagination required to create the book properly. (Below) The top pages are the scanned pages from out of the book. (Below that) are pages that have been doctored in Indesign Once the pages were scanned in, I was free to add the handwriting and various stamps on the computer, reprinting the entire book on appropriately colored paper. Since my handwriting is not all that good, this was a great way for me to achieve a realistic looking period look to the writing and typewritten or stamped items. There were plenty of examples out there of war-time Soldbuchs. I could translate them using online programs like BabbleFish, I even found a tutorial online that had a line by line translation of most of the book. I did a lot of research on it, filling a notebook with examples and explanation. I didn't want to just copy someone else's Soldbuch, I wanted it to be original and I wanted it to make sense. The research took about 6 months. Creating the book took about 2 weeks.
So, why am I boring you with this little story? Well, there is some application for our hobby. A lot of items in 1:1 scale can be reduced to 1:6th without too much trouble. There is some simplification of course, but many items can be made in the smaller scale. I am currently working on WWII German art. I think, when it is all done, there will be some pieces that haven't been seen in 1:6th before. One thing is for sure, my reenacting research is coming in handy now. That's all for tonight, until next time, have a good one! |
SSCC
|