VIETNAM ERA GUN TRUCK - M-151 MUTT with armor by POINT MAN
This is a quick behind the scenes look at my Vietnam armored Mutt (M-151). This is a great project if you have an old 21st Century Toys M-151-A2 sitting around, collecting dust, or if you can get your hands on one real cheap.

STEP 1 - Get your hands on one of these.
These are not terribly easy to find, but perhaps you already have one, or have a friend that you can talk into selling you his. If that fails, "Ebay, you're my only hope"... |
STEP 2 - You need a pattern.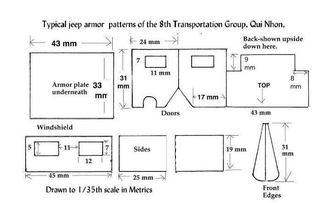
I don't remember where I got this from, but I have been recently informed that it was drawn by Jim Lewis of Gun Truck Studios. It is a great set of templates once you blow it up to 1/6th scale
|
STEP 3 - STYRENE - Our Friend
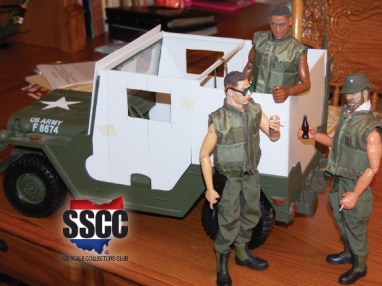
It was pretty easy to scale up the armor. I used the vehicle windshield as a starting point and just sort of "eyeballed" it. Once I had a rough pattern. I cleaned it up with a ruler, cut it out and glued it to some cardstock, which I then cut out to trace onto styrene. I had a bunch of styrene on hand, but it was too thin, so I glued two sheets together to get the thickness I wanted, then I cut out the pieces I would need.
You can see in this picture that there is no detail at this point and the doors are being held in place with masking tape.
You can see in this picture that there is no detail at this point and the doors are being held in place with masking tape.
STEP 4 - Add some detail.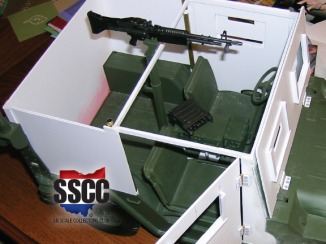
Next step was to add some channels for the window armor and hinge the doors and the windshield armor. I used dollhouse brass hinges. I used epoxy putty to make it look as though the hinges were welded in place.
|
STEP 5 - The radio.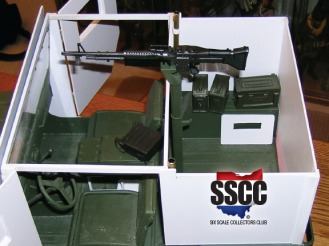
Most of the pictures I could find seemed to indicate that the radio was on the back right wheel well in these vehicles. I thought it would be more interesting though to place it between the driver and the vehicle commander, so I build a frame for it and mounted it there.
|
STEP 6 - The Fenders.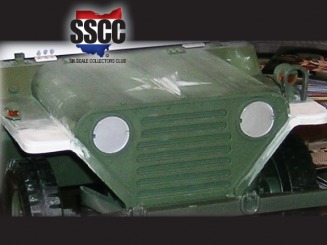
Research I have done indicates, contrary to popular opinion that there were some M-151 A2's in Vietnam. The 21st Century Toys Mutt is an A2. The most recognizable thing about an A2 is the curved fenders and recessed lights. I wanted to to avoid that whole controversy though, so I cut out the old fenders with a Dremel tool and rebuild them into the straight M-151 fenders seen on the earliest version of the vehicle. This is a pain, but I like the way it turned out.
|
STEP 7 - Painting and Detailing.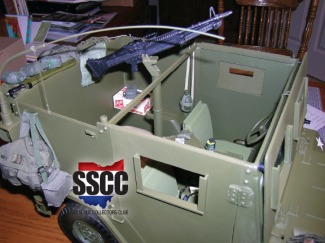
Once the last of the conversion was done, I sprayed areas of the vehicle where I was going to have stars with white spray paint. Once that was dry I used star stickers purchased at an RC store for masks, then I painted the entire vehicle with Testor's Dark Green military flat enamel. This was followed up with an overspray of Olive Drab. Once the painting was done, I started detailing the vehicle with items that I wanted to have weathered right along with the vehicle.
|
STEP 8 - The Lived-in Look.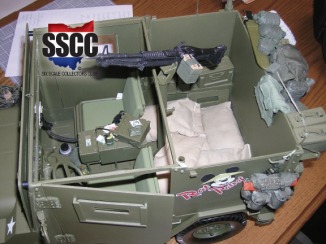
A lot of these vehicles had an armored plate under the driver and passenger seat (attached to the frame of the vehicle). But it wasn't able to cover the cargo area. The crews tried to improve the gunner's odds by adding a layer of sandbags. Like armored vehicles, soft skins often become "mobile homes" for their crews. I like to add a lot of junk to give it that lived in look.
|
STEP 9 - Then comes the weathering.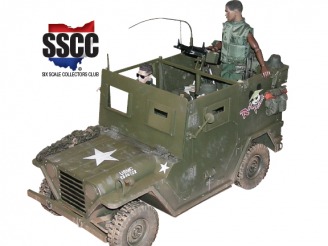
My vehicle has a lot of scrapes and dents, peeled paint and even rust, all things that would happen to the real vehicle in this theater of combat. There were several oversprays of various shapes of brown, black and terra cotta paint. I wanted it to look like it had been through the mill.
|
STEP 10 - Add some more junk.
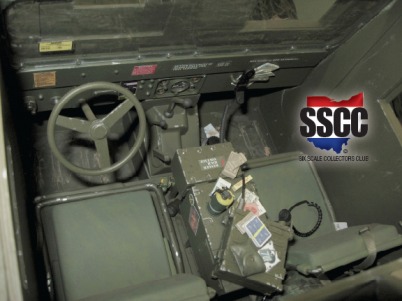
I tend to add a lot of "paper-stuff" to my vehicles; maps, cigarette packages, cards, documents, pictures, magazines and more. Not only does this stuff add some color to the vehicle, it completes that lived in look. It also sort of tells a little story about the crew, what they are into, etc. I keep adding stuff until I achieve the level of clutter that I am looking for. I let it sit for a bit and evaluate. If I am happy, then I call it quits. Hope you found this little tutorial helpful - Point Man.
