|
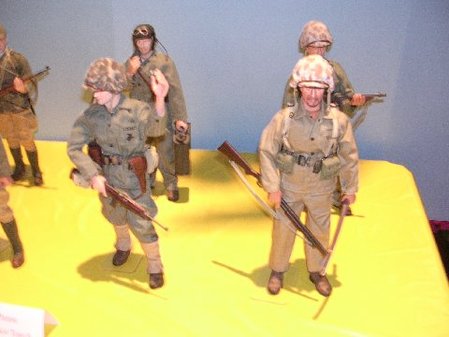
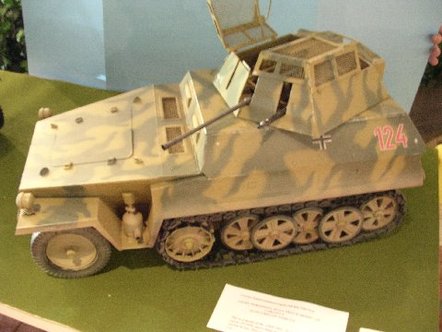
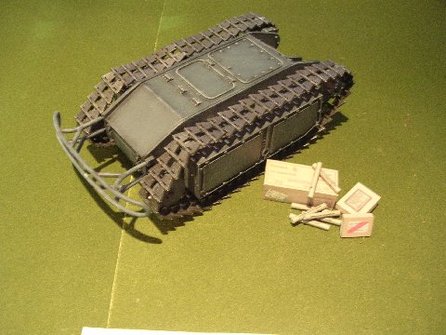
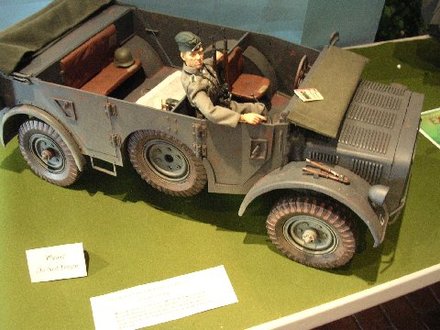
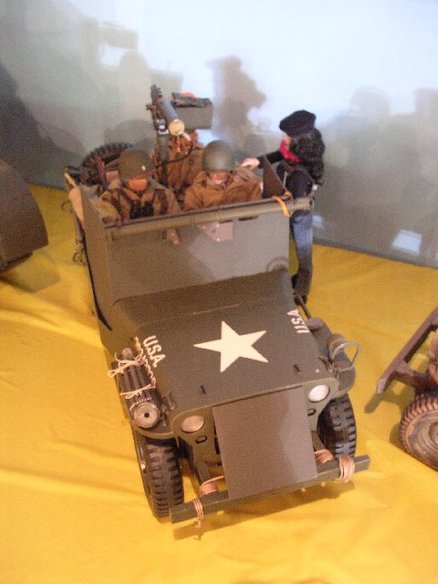
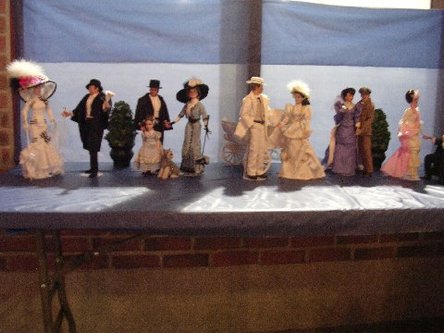
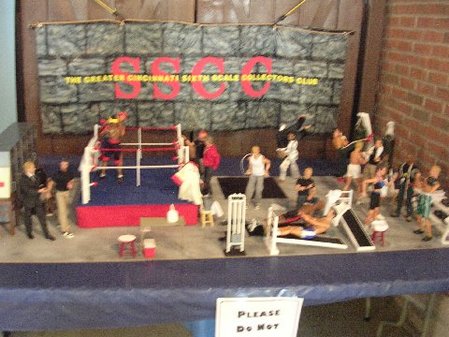
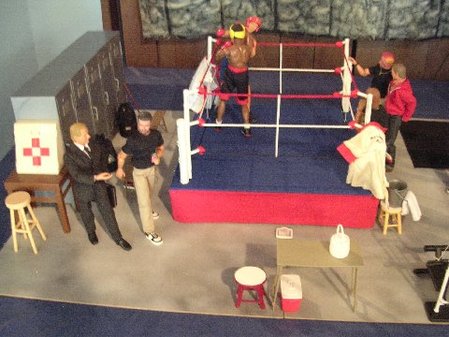
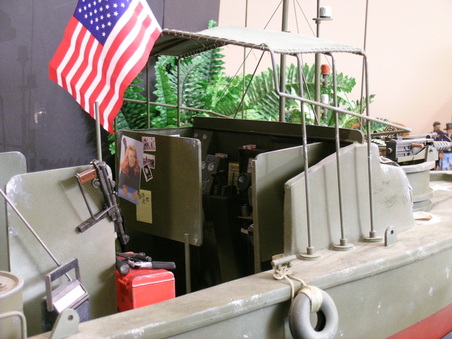
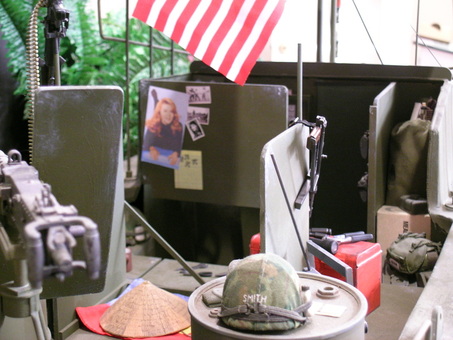
This last weekend was the show at Entertrainment Junction (have I got that right on the name?) in Cincinnati. Some of our SSCC members set up some displays there and Hammer Six got a few pictures. I am not sure what all these are, or who's stuff is what, but I believe beside Hammer Six that Dr. Zorkon, MadDog and Gun Shy were there. If there were others, I am sorry I missed your names guys. I wasn't there, so all I can really do is show the pictures. Hammer Six did tell me that he handed out about a hundred cards with info on the Ft. Thomas show, which is our big show in November. There were quite a few people that came through the Junction though and hopefully some of them will check out our show too. Thanks to Hammer Six for sending in these shots. This is just a taste of some of the stuff that was displayed by SSCC members and a very small taste of what all will be on display at the show in November. Wish I could have been there guys, some great stuff. That's all for tonight, until next time, have a good one.
5 Comments
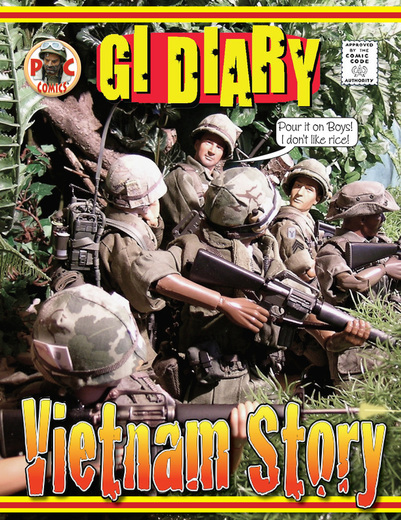
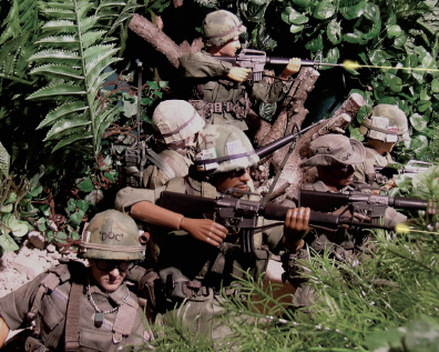
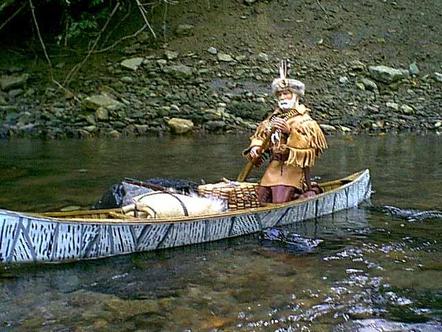
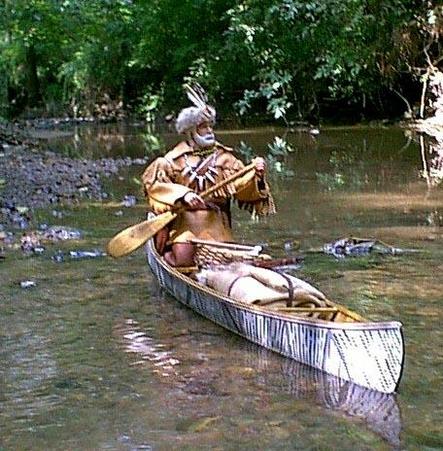
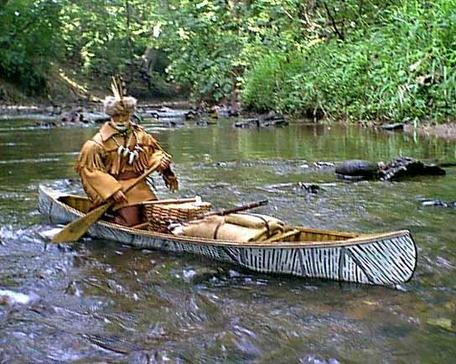
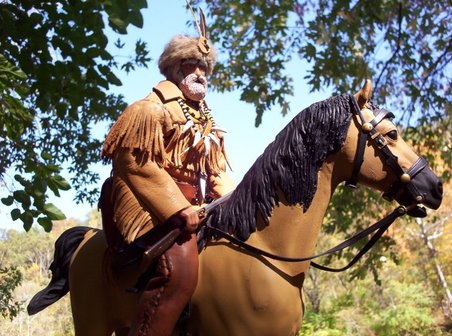
Sometimes in the course of doing a graphic novel like VIETNAM STORY, I am sort of surprised at the way things go. Case in point was my Justin Case series, in which the characters of the story ended up on the holodeck of my Star Trek starship, the USS Bunker Hill. I don't think anyone was expecting that, including me. I find it interesting that if you stay with a story long enough, the characters and situations have a way of taking on a life of their own. I have heard novelist talk about that happening when they are writing. If it can happen in a novel, I suppose that it is possible on some level with a graphic novel. Thus, it raises the question for me, where is Vietnam Story going next. 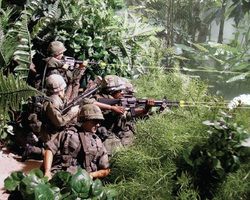 I would love to be able to answer that question, but I really do not have a clue. Since I started this thing, I have created a lot of new characters. I have easily tripled the number of Vietnam figures, so there are a lot of characters to introduce and a lot of ways to do it. Whereas I had one squad when I started, I now have two, which is equivalent to half the platoon. Considering the amount of space I usually work in, it won't be too hard to trick people into believing they are looking at an entire platoon. 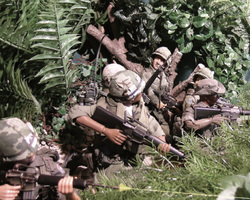 I have also added about half that number in special forces figures as well as a small Marine contingent and an armored gun Jeep. The additional characters allow me to head off in some directions that were not possible before, but if that is not enough. I am well on my way to completing two modules that will give me a significant set of the firebase, which will add even more possibilities. 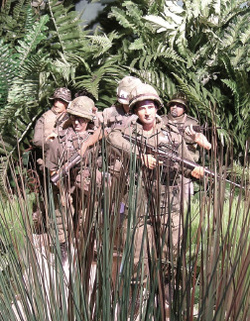 So here's the question, what would you like to see happen in the series? If you were writing it, what would you write next? Is there a certain aspect of the conflict that you would like to see played out. I am not saying that I am going to necessarily do everything that everyone suggests, but I would like to know what you all think about the series and where you think it should go. It will be fun to see if any of us are right. I have some pretty specific ideas about how I want to do certain things, it will be interesting to see if they really turn out that way. As I said, sometimes I am surprised as well. There is no question about one thing though, once the firebase set is finished, the story will be continuing. 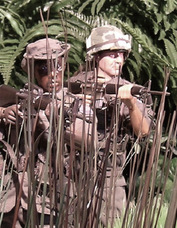 Well, that's all for tonight. Until next time, have a good one! Okay, I'll admit it...tonight I am doing a shameless plug for my good friend's website, but Mountain Men are cool and he got the pattern for this great outfit on his site, you really do need to check it out. I clearly remember the first time I ever saw this picture by CK2 on GL's website. I was in absolute awe. Up to the point when this shoot appeared on the site, pretty much all the figures I had seen were military themes. This was something completely new by my good friend CK2. Even by today's standards, this Mountain Man is a work of art. But the significance of this figure for me was that it opened up the possibility of modeling historical figures. You couldn't help but look at this and think about all the other scenes of the Great American West that could be modeled in 1:6th if one just had the time and patience to do it. Of course over the years, Ck2 has continued to explore the American West with unique Indian figures, other Mountain Men and Cowboys. He has created wagons, and even a pioneer river flatboat. It has been tremendous stuff and I have enjoyed seeing each journey he's made into America's past. On his website, you will find a pattern for the buckskins that you see on the figure in tonight's update. 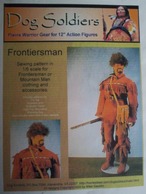 Dog Soldiers is long gone as a company as far as I know, but you still can create the outfit in tonight's pictures if you can follow a pattern (or you have a wife that can). You too can journey into America's past and create your own Mountain Man or Indian figures. Visit CK2's website for patterns like this and a lot of other great things if you haven't already been there. You can find it at the link below. www.checkmateking2.weebly.com Yes, I love WWII Americans and Germans as much as the next guy, but I mean "come on, this is just too cool". Check it out on CK2's site and think about making your own Mountain Man.
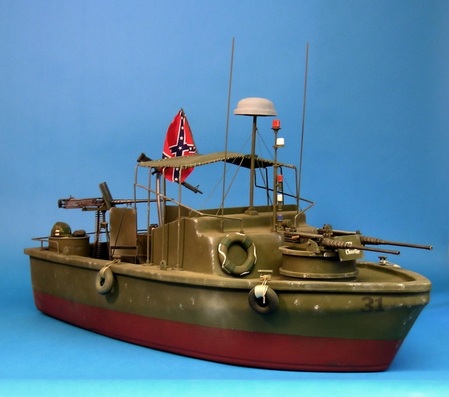
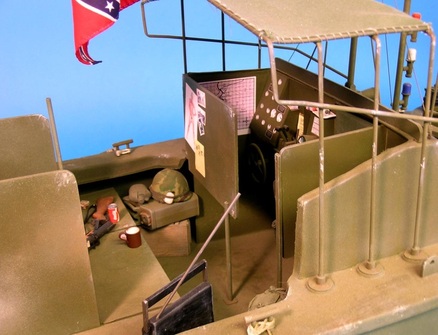
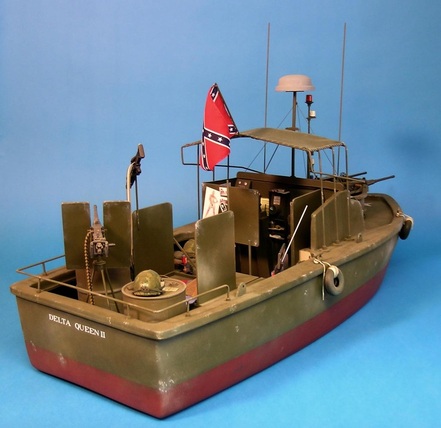
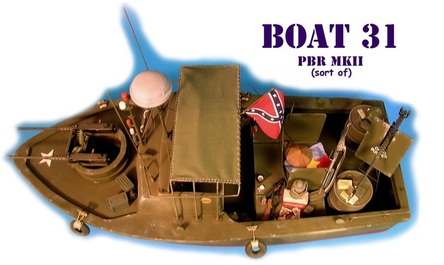
Until next time, have a good one. Tonight we are going to look at an oldie but goodie - my PBR, well...I say mine, I guess that really isn't true anymore since I no longer have possession, but since I built it, I guess I have the right to still feature it on occasion. I would guess that if you still want to buy one, they are still available, at least they are still on James DeSimmone's site, you can always email him and find out. I guess my point in showing it though is to encourage those of you who might already have another one of his models that with a little work, you can make it look pretty good. And work it did require. I pretty much kept the hull and thru everything else away. Even the hull received major modifications to make it look more like a MK II PBR. The first thing that was required however was a deck. The hull was simply that - a hull. After floating it in the bathtub to see how high it would float in water, I decided that it was going to need quite a bit more weight. The deck was cut out of a piece 3/4" presswood that I had lying around. The raised section in the aft section was created with four pieces of 2x4". Everything was then covered with thin styrene. Once there was a deck, then a styrene bulkhead was added to the cabin and the various shields were added. The model is not scale width, so I had to mess with the spacing quite a bit to get what I am defending as a "close enough for government work" look; not accurate, but generally capturing the feel of a PBR. 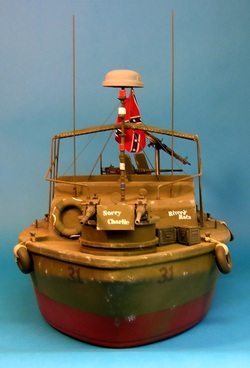 The foredeck suffered the same problems as the rest of the vessel, it wasn't big enough and the compression was really too much for the level of detail I wanted to include. The result was more of a caricature than a scale model, but it certainly worked in photos. The foredeck had to be rebuilt with styrene and a new hole cut for the gun tub, speaking of which, that was replaced too. The front of the cabin had to be rebuilt with styrene and putty to give it more height and a more correct shape. Then that support structure for the canopy and the railings all had to be built out of brass tubing. That actually didn't turn out to be as hard as I thought it would be, for which I was grateful. Painting, weathering and detailing was next and there was plenty of it. I have always gone for a cluttered look with all my vehicles, because I like that "lived in-fought in" look. In the small confines, the clutter really is intensified (it actually doesn't take as much to do the job). 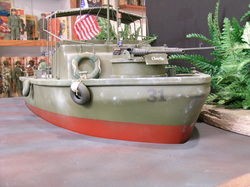 Once the boat was built I had to decide how I was going to photograph it on a regular basis. I didn't live near a creek and the boat weighed about 25 lbs. I decided that I would build a water set for it instead. Out of a piece of plywood, I cut a whole the shape of the hull and lined the edges with felt, so that I wouldn't scratch my paint job up setting and removing the boat from the diorama. Then I painted the plywood with a variety of different colors and over sprays to try to build up some depth to the "Water". As you can see from the pictures, it never 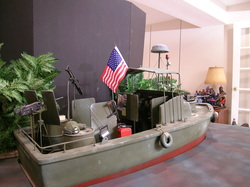 really did look like water, but it was a nice foundation for Photoshopping the water into each scene. This was a fairly complicated process, building up layers of opaque images to create waves, reflections and wakes. I really never want to do it again. When we left Colorado to move to Ohio, I left the PBR with someone in our Joe Club. I was kind of afraid to dry and move it and I was pretty sure I wouldn't have room for it. Yes, it was under-scaled, but it was still one big model. I don't regret it too much because it really wasn't about possessing it, all of the fun was in building, photographing it and then working with the images. Now mind you, it is not a project that I recommend. It was a tremendous pain in the butt...period. You have really got to love the Vietnam era to tackle one of these babies.
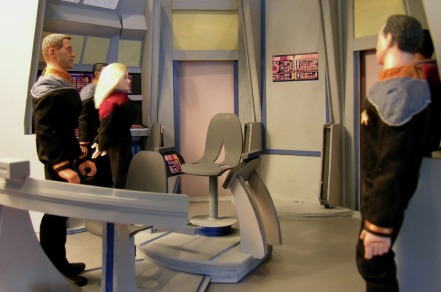
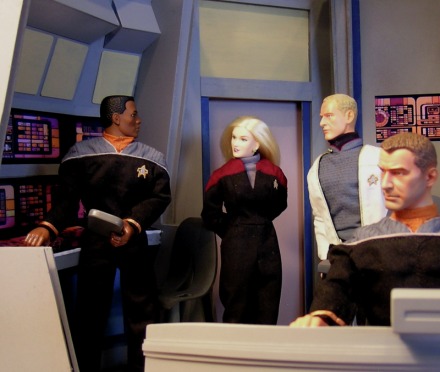
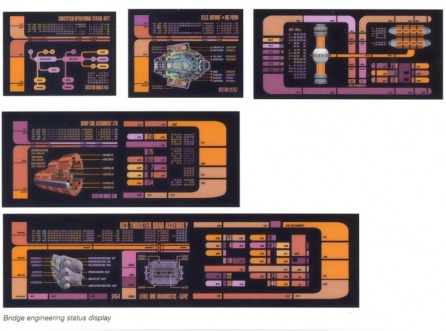
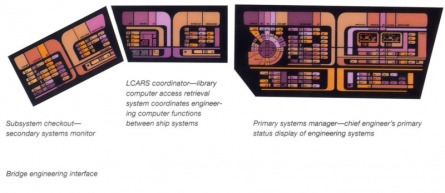
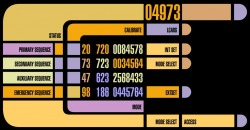
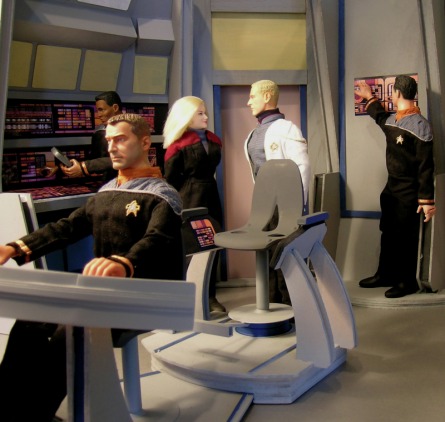
Well, that is all for this week, until Sunday night, have a good one! Quite a while ago I talked about the process of building a Starship Bridge for my Star Trek - First Generation series. Next, I covered the process of creating a special effect like "beaming down". Tonight, I would like to continue along the same vein with a look at the artwork that completed that bridge that I first talked about. The bridge of my USS Bunker Hill is admittedly, a pretty cool set, but what really makes it special is the artwork panels that appear at all the various crew stations. Without that artwork, there really wouldn't be anything about the bridge to catch the viewer's eye. Those colorful panels that we have seen on the Next Generation, Deep Space Nine and Voyager, well... they are what make the starship set believable. The ones I use on my set are highly detailed, they go together and they all came from a single source. Years ago, I picked up a Trekie "Manual" for the Deep Space Nine series. In that book were beautiful color plates of pretty much all of the control surfaces on the USS Defiant bridge. When I decided that I wanted to do a 1:6th Star Trek series and that I was going to build a scaled down version of the Defiant bridge, I had all the art at my fingertips. It was just a matter of scanning it and scaling it down to the size of my model. I printed the final artwork on gloss photo paper so that I would have the sort of shiny "glass-like" surfaces that you see in the TV shows. The effect worked far better than I ever imagined and the end result was a pretty realistic looking environment for my 1:6th actors to work in. And it has held up pretty good over time, which is rather amazing considering that it came to Ohio in the back of the car and my first episode was shot on the dining room table of a temporary apartment the first month I was here. I think the Bunker Hill still has quite a few Voyages in her... going where no 1:6th Action Figure has gone before.
Until next time, have a good one! Tonight, we've got a review of the Dog Soldier's Cavalry Uniform from Okimbored. This is a fairly old set, that you can still find out there amazingly enough. For the money it is a pretty good value, but I will let 'OK' tell you about it and some of the things to look out for with this set as well... 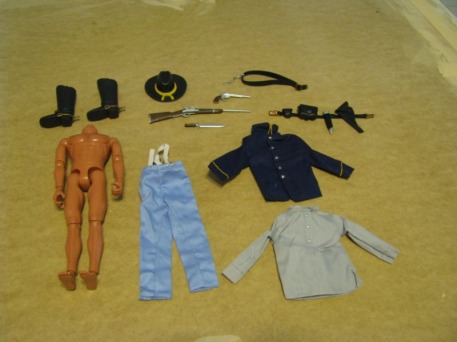 This is what you'll get if you order the Dog Soldiers Trooper, With the advancements in bodies since 2000 I couldn't justify buying the actual boxed figures since I don't save boxes anyway. 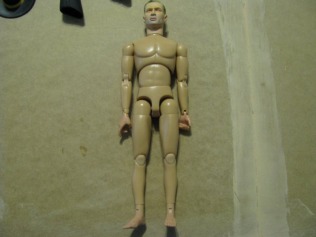 You'll need to get a suitable nude for the uniform, this is trickier then it appears as you'll see. 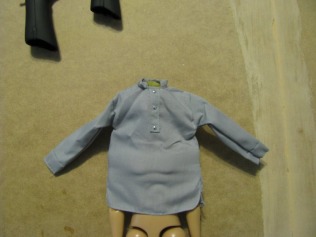 The Dog Soldiers shirts have a false opening on the front, so your nude will need to have his head removed, I remove the hands at this time also. 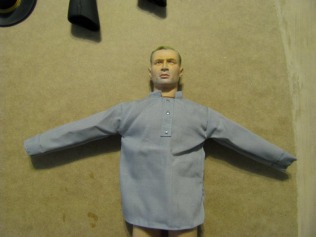 With a quick dip in a pan of very hot water, the head can easily be removed, the shirt put on, and the head replaced. 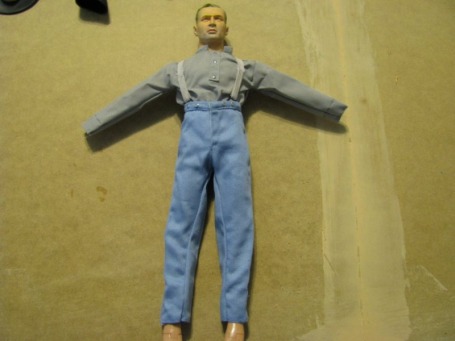 Next come the trousers, unfortunately this pair is the first flaw I've found out of 10 uniforms, the left suspender is sewn backwards. In this case it really doesn't matter since they won't be seen, and even if you only ordered a pair for a bash where they would be seen it would only take a minute to cut the thread and re-sew it correctly. 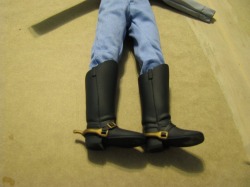 here we get to the boots, these are big enough to easily put on any foot I've tried, unfortunately as you can see, they don't compare well with modern boots, keep in mind those would cost more per pair then this entire figure including the nude! 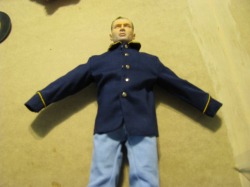 Next is the blouse, The material might be a bit thin, but once on the figure it looks fine to me. 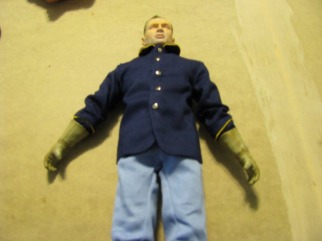 At this point I've given him his new hands, I really like the gauntlet look for these figures, and although apparently not designed to hold anything let alone a weapon, the Dragon Models hands from "Kenneth Laird" and "Eddie Mac" are the best I've found. Kenneth's gauntlets, which I prefer, are a bit yellower and very hard to find now compared to Eddie's, which are more tan and available at most loose parts dealers. 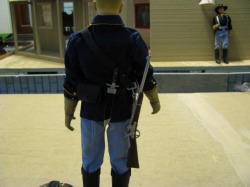 The belt is on, along with the rifle sling, you'll need to supply your own ring if you want to actually attach the rifle. The belt itself isn't bad, as I prefer plastic belts to pleather, however once again the age of these figures shows with the quality and detail of the pouches. 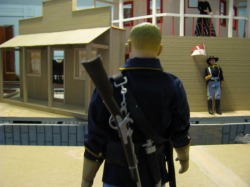 The next issue is probably the most bothersome, when attached to the sling the rifle should hang like this, so it can be grabbed over the shoulder for use while mounted (the sling is not used while on foot) 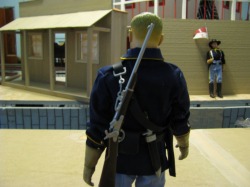 Unfortunately being all plastic, the rifle butt is much heavier then the barrel causing it to hang upside-down, I'm thinking the barrel could be drilled and wire inserted to try making it heavier then the butt, but I haven't tried it yet 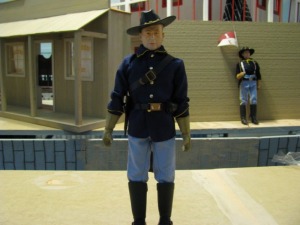 With the hat added we have a complete trooper ready for battle. To me the hats are the worst part of these figures, but 10 years ago molded hats were the norm and still are with many companies. The Dog Soldier hats are pretty shallow, so finding heads they fit well on can be a real challenge. I've gone through every Dragon nude I have, and as you can see some are ok. I've also tried fitting the hats on quite a few Power Team bodies, while I have found a few the hats will fit, I still haven't found out how to remove a Power Team head so I can't get the shirts on. All in all, for being about ten years old now, and only available at a few obscure online dealers besides Good Stuff To Go (a great company to deal with) at $24 and your nude, I can't sing the praises of the Dog Soldiers products loud enough, which is a good thing since if your interested in the Indian Wars time period, Dog Soldiers is basically the only game in town.
With no serious competition, even ten years after the closing of their doors, Dog Soldiers remains a great product at a great price. something to keep in mind if your interested in this time frame since the supply truly is limited. If released today these figures would certainly be in the $60+ range and if the 1/6th hobby does see another company produce a similar product made with today's standards it would easily be $100+ Although I've only shown the basic Trooper as it would come from the dealer, keep in mind the many areas these figures could be improved. The shirt can be completely left out as it cannot be seen. The blouse could be greatly improved by removing the dot buttons and replacing them with real buttons from Battle Gear Toys. While I would choose to keep the plastic belt, the pouches, knife, and even the rifle could easily be replaced again from Battle Gear Toys. While not the greatest, I don't think there is a reasonably priced alternative to the boots, if money is truly no object to you Newline Miniatures makes some very nice ones. And many people are now making their own hats. With some weathering to the entire figure you can easily have a great looking Indian Wars trooper for about $35 plus shipping. Well, this is OKIMBORED signing off, thanks for reading and until next time, have a good one! Guys, sorry to do this to you again. It is actually Tuesday morning and I am back at work. I got home last night and our modem was off-line. I tried repeatedly to reboot it and finally called Insight. They tried several times to reboot it with the same result. They are sending someone out today to either fix it or replace it. I had planned to put up Okimbored's review of the Dog Soldier Cavalry outfit last night but couldn't get online. Also didn't feel like driving to the nearest Panera to use their free Wi-Fi. But if that is the only way we can get an Update tonight, that is what I will do. Hopefully we will be up and running again by the time I get home.
Some might ask why I just don't do it here. Well, if all I was going to do was chatter, I guess that would be just fine, but I know you all like pictures (like me) and I am not able to upload them here thanks to a little immovable barrier called a FIREWALL. I guess it is their way of keeping us from passing secrets about the grocery industry to the Taliban. Stuff like, "where the bad eggs are hidden, etc, etc." I guess I can talk a moment about what's coming up. I already mentioned Okimbored's review. I also have a couple of features of CK2 projects which feature his Mountain man and his Indian teepee. I also have a short Update on a 1849 Miner and finally my PBR (or what used to be my PBR). In any case, there is some good stuff coming. So... since we can't look at any pictures in this update. I have a couple of questions for you. Question 1 . What is your favorite Military themed TV series (all time)? Question 2. What is your favorite Military themed book (fiction or non-fiction)? For me, the TV series would be TOUR OF DUTY, particularly season 1 and the book would have to be UP PERISCOPE, as a kid and young adult, I read it so many times that the pages literally starting pulling out. Well, that's all for now, until next time, have a good one! Tonight is going to be short and sweet guys, no pictures. I have a couple of things, but it is nearly 9:00 pm, it's Sunday night and I'm tired. I am making an appeal once again for material. I am having a hard time coming up with stuff and I could use some submissions (pictures of favorite figures, tips, reference stuff...whatever). I need some help folks. Like I said, I've got a couple of things for this week, but I would sure like to have some stuff from y'all.
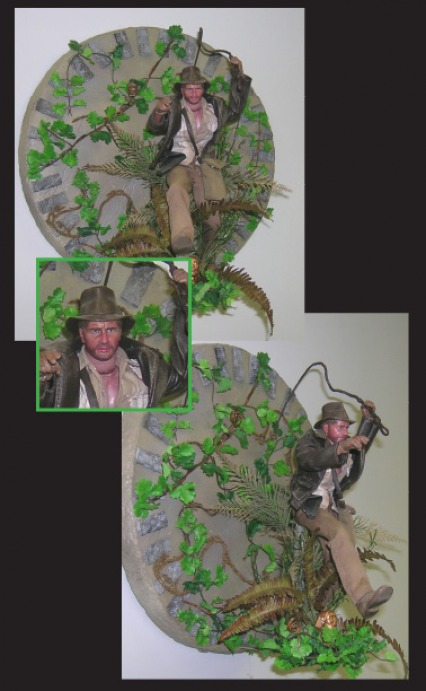
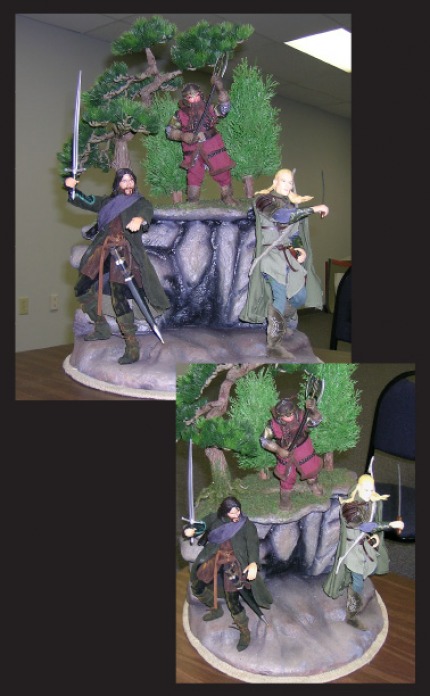
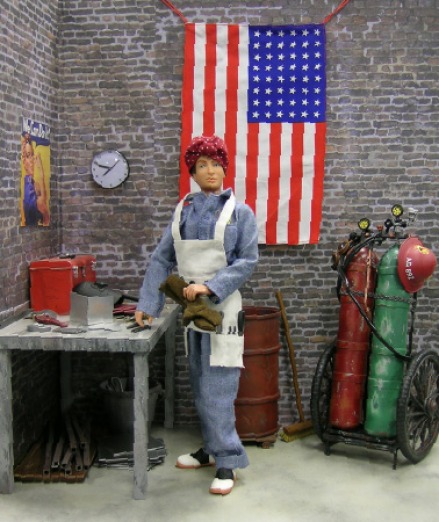
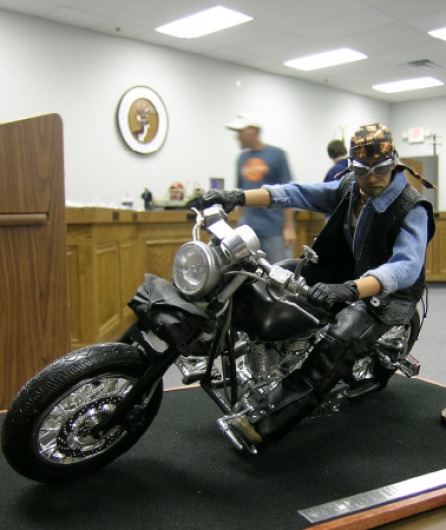
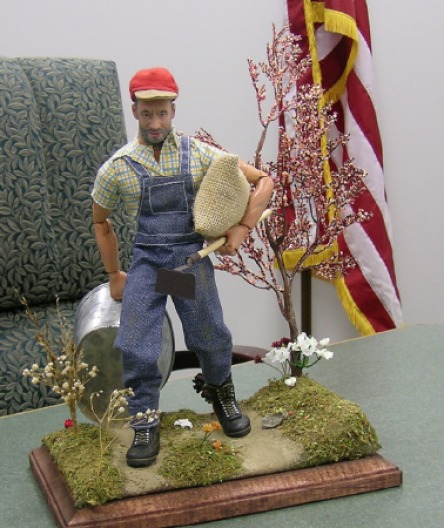
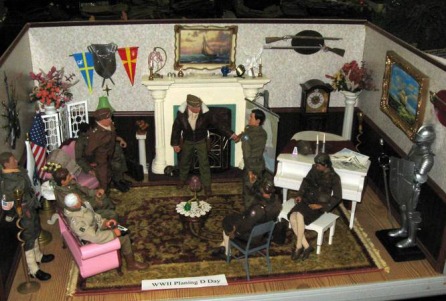
Just an interesting fact for you, the German 1:6th art was pretty successful. In two days, we got about 1,200 visits at Point Man's Privy and close to 1,000 at the SSCC. It has of course tapered back down, but we are running at higher numbers on both sites. I think it is going to be real important to keep it fresh. Thus, my appeal this evening. Oh, I can continue to find material, but we will appeal to more people if it just isn't me jabbering all the time. So, send me your pictures, etc. I need them. Well, hope everyone had a great weekend, until next time...have a good one! I thought we would end the week with a feature on the artistry of Dr. Zorkon. Without a doubt the good Doctor has some of the most unique figures I have ever seen and he has this incredible knack for finding some amazing deals. So let's sit back and enjoy a few favorites. Let's start with this really cool wall display with a customized Hasbro Indiana Jones. The Doctor came up with this really unique looking hanging display piece and then a nice job of improving the figure, placing it in an action pose. In a similar vein, we get three of the heroes from Lord of the Rings, placed in an interesting vignette that features a couple of different levels, which is a great way of putting three figures in the space normally used by two. You could use a display like this for a wide variety of sci-fi/adventure figures. This display with Rosy the Riveter is one of my favorites. I really like all the cool little details in a fairly small area, especially those welding tanks. There is a lot of cool stuff here. I see something new every time I look at it. Another favorite, is this motorcyclist. It is really cool how the Doctor displayed the bike at this angle. There is a small piece of thin fishing line attached to the bike and the base and it is doing all the work. You don't even see it if you don't know it is there. It is beautiful work - both the bike and the biker are custom work and they really look amazing. I would personally love to have this figure and bike in my collection. Beautiful work Doctor. Another unique little figure vignette based on the character of Forrest Gump. I love the base. There is a ton of detail there with the various plants and the grass. It looks quite real and my photo really doesn't do it justice. The Doctor also likes to do big scenes, like this D-Day planning session. There is so much stuff in the display and I have no idea where the Doctor picks it up. I really like the fireplace. What a cool feature for any interior, but it really gives the room a feeling of being in an English country manor. All great stuff. I know I personally look forward to each month's meeting to see what Dr. Zorkon is going to bring. He never disappoints. Well, that's all for this week. We'll start up again on Sunday night with a new installment of the UPDATE. Until next time, have a good one!
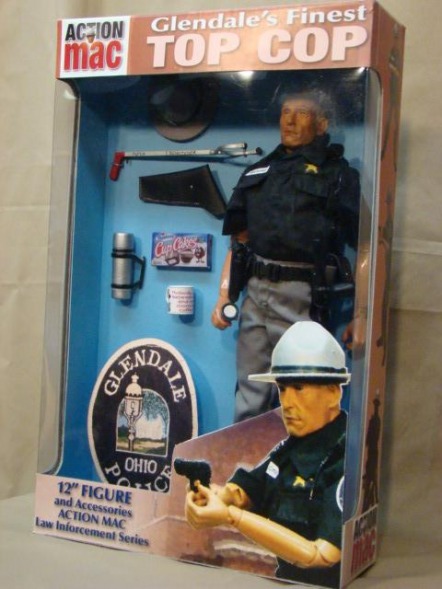
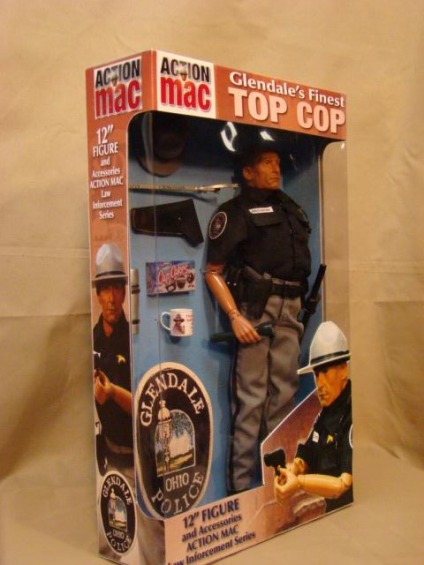
Over the years I have heard an awful lot about "Mini-Me" type figures. About a year ago, Fubar IV asked me to help him with a Mini-Me type project that he was doing for his wife's step-father. The step-father was a cop and Fubar already had a figure selected that had a similar look. He also pretty much had the uniform and the gear completed as well. What he wanted me to help him with was making a box to put the figure in. I thought it sounded like an interesting project. He provided a Joe box, which we would cover with a new "skin" and I set out trying to determine the parts I would need to create. Here is a picture of the final figure in the box. The step-father's first name is Mac, so we decided to do a play-off of Action Man and call it an "Action Mac" figure. I asked Fubar to provide me with some pictures of the picture and he took some great action shots that we could use for the box art. He also provided an image of the Glendale Police Patch. The first thing I did was measure the box and create the shapes that I would need to cover the old box art. Once I had a template I begin to work on some ideas of what I would do with my various art pieces. I looked up Glendale, Ohio Police up on the internet and was also able to get some additional images that I would be able to use on the back of the box. By sampling color from the figure pictures and other available art, I was able to create a pallet of color that I would use on the box for backgrounds, type, etc. 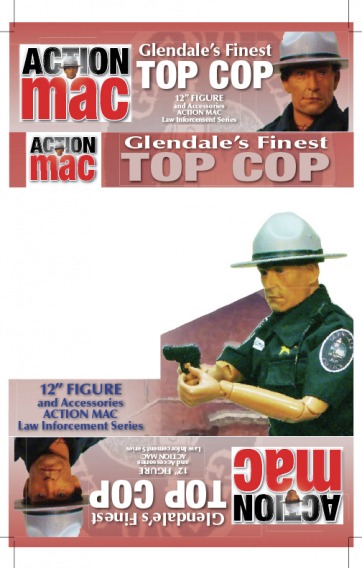 This was the final art for the Box Front - Top and Box Top, Bottom and Box Bottom. The design has an Action Man feel to it with the logo and the large cut out of the figure in the lower right corner, but the addition of the figure picture on the right of the box top and bottom feels like early Dragon boxes. I really had a good time playing with the various pieces. 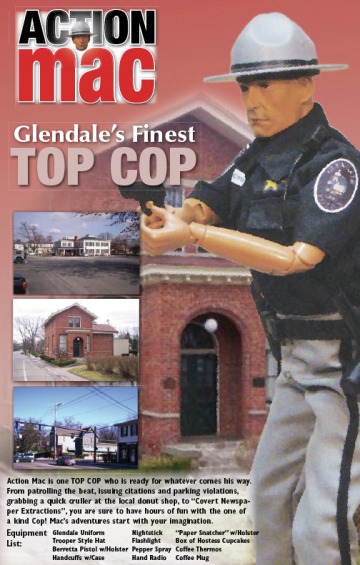 The back contained three pictures from the town of Glendale, including the old brick Police Station. I decided that I wanted to include that brick building in my large image of the figure. So I posterized it to achieve an artwork look. It also got a gradient fade and some other effects and the figure itself received the same treatment so that it would resemble one of the beautiful artwork type boxes that Hasbro was so good at (too bad their figures often didn't live up to the quality of the artwork). 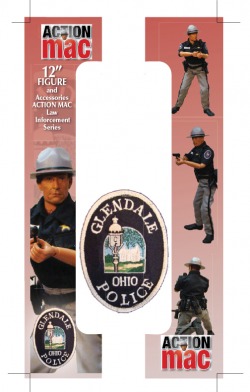 The sides had a diecut with rounded corners that had to match up perfectly to the actual diecut of the box. This was probably the most difficult part of the project. On one side with had the "artwork" figure once again and on the other side the figure in a smaller size in three action poses, a throwback to the old Hasbro boxes of the sixties. I really liked the way this particular feature turned out. The large patch artwork in the center was to be used on the interior of the box. Below another shot of the completed box with the figure inside. 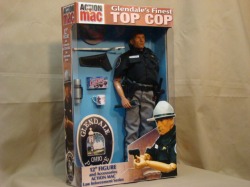 The final pdfs were fairly large and had to be taken to a copy center that could do large format printing from pdfs. A semi-gloss type paper was used. The pieces were attached to the box with Spray Mount. We couldn't believe how well it fit and how much it looked like a real mass produced figure when we were done. 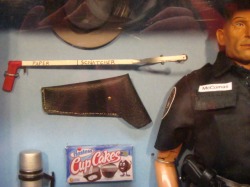 Here's a close up of some of the accessories inside the box. They have all been tied in place by Fubar, like the old Hasbro boxes. Check out the Cupcakes (a favorite dessert of Mac's). And you though donuts were the only thing that the boys from Glendale would eat. It was a real fun project. I would like to try another one sometime, I really had a good time working up the art and the result was well worth it. I would like to do a figure of myself sometime, but I am pretty sure that there is not a ready made sculpt out there and I don't think I am going to be sculpting one. Anyone else out there ever do a Mini-Me or a figure of a Father, brother, etc? Love to hear about it and see a picture or two.
That's all for tonight, until next time, have a good one! |
SSCC
|
- HOME
- ABOUT THE SSCC
- CONTACT THE SSCC
- 2011 FT THOMAS Newspaper articles
- 2012 FACES of FT. THOMAS
- WACO MILITARY EXPERIENCE
- INVASION - AN SSCC DIORAMA
- Battle of France Teaser - An SSCC Mini Dio
- BATTLE OF FRANCE - An SSCC DIORAMA
- The SSCC's Approved Vendor's List
- MARINE Museum Review
- SSCC DISPATCHES NEWSLETTER ARCHIVE
- THE OLD BLOG ARCHIVES
- OLD BLOG ARCHIEVES p. 2
- OLD BLOG ARCHIVES P.3
 RSS Feed
